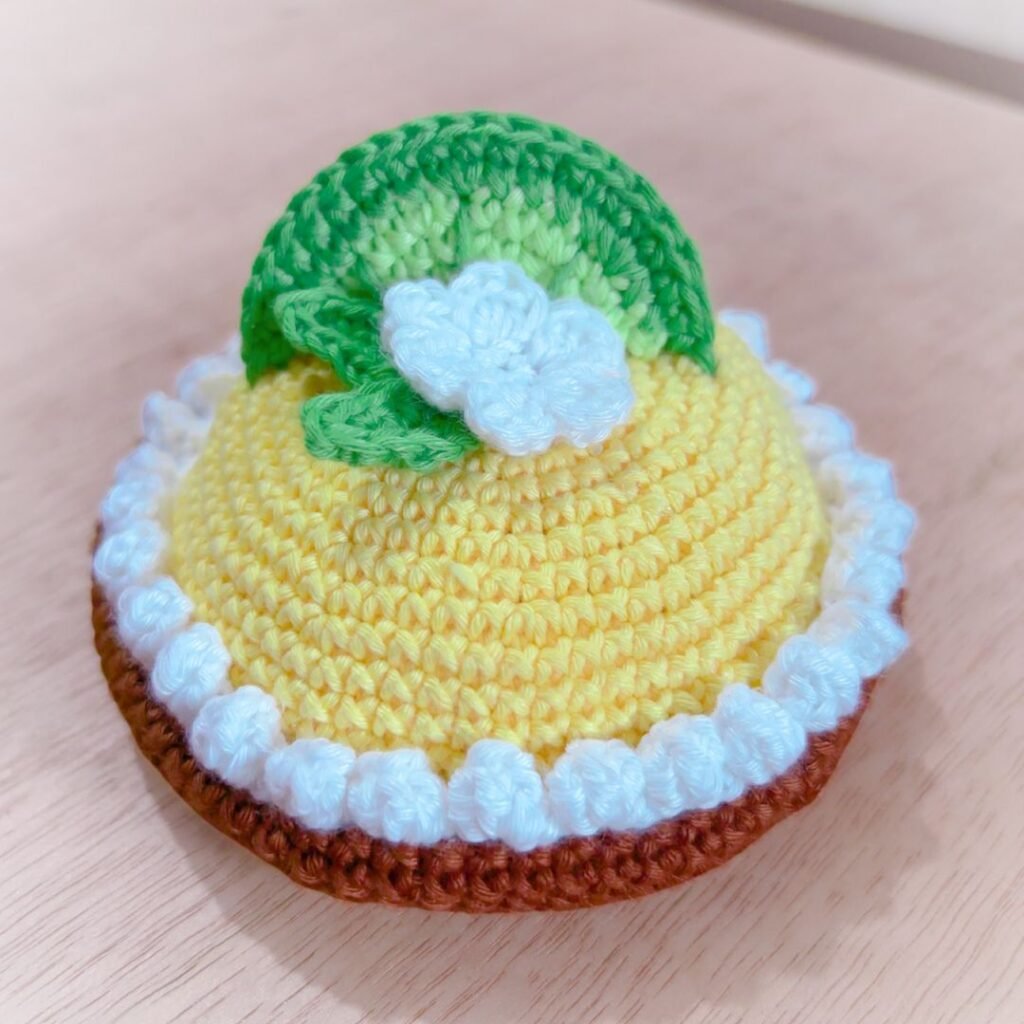
This is a free crochet pattern for an easy-to-make mini lime pie. A quick and fun pattern for something cute. You could easily turn this into a different crochet pie such as chocolate, strawberry, … by just changing the colors (and not using the lime slice then).
Downloadable version:
A downloadable version without ads is available on Etsy and Creative Fabrica
SIZE:
The mini pie has a diameter of about 10cm or 4inches.
MATERIALS NEEDED:
YARN: “fingering” weight (size 3) yarn such as Catona, Catania, .. in the following colors:
**If you click on the colors above it will take you to the Dutch website Haked.nl where this yarn is available. You can of course use different yarn. (These are NOT affiliate links. I do not earn any money from linking to that yarn. I just want to make it easier for you to see which colors are good.)
Crochet hook: 2mm
You will also need: stuffing, scissors, pencil, cardboard, glue, tapestry needle
ABBREVIATIONS:
- Ch: chain
- Slst: slip stitch
- Sc: single crochet
- Hdc: half double crochet
- Dc: double crochet
- Inc: increase
- Dec: decrease
- MR: magic ring
- R: row
- FLO: front loops only
- BLO: back loops only

Extra info:
- The color needed for the row is mentioned at the beginning of the row. If nothing is mentioned, then use the same color as the previous row
- The ch1 (or 2) from ch1 and turn does not count as a stitch
- Always crochet in both loops UNLESS STATED OTHERWISE
- The **1, **2, … at the end of some rows, tell you which picture goes with that row
Copyright info:
Even though this is a free crochet pattern, the same copyright laws as patterns you pay for still apply. This means you cannot print it to distribute/share, sell it, claim it as your own, post it on your own website, post screenshots or pictures of the text online or on social media, … You can also not use this pattern for a YouTube vidoe. If someone asks where they can get the pattern, you can share the link to the pattern.
You may sell the finished pie but not the pattern itself.
PATTERN:
Part 1:
R1: with brown: 6sc in a MR
R2: inc 6x (12)
R3: [1sc, inc] repeat (18)
R4: [1sc, inc, 1sc] repeat (24)
R5: [3sc, inc] repeat (30)
R6: [2sc, inc, 2sc] repeat (36)
R7: [5sc, inc] repeat (42)
R8: [3sc, inc, 3sc] repeat (48)
R9: [7sc, inc] repeat (54)
R10: [4sc, inc, 4sc] repeat (60)
R11: [9sc, inc] repeat (66)
R12: [5sc, inc, 5sc] repeat (72)
R13: BLO: 72sc
R14-20: 72sc
- 1slst in the 1st stitch
- Cut the yarn
- Fold the border to the inside and glue in place (**1)

Part 2:
R1-11: the same as R1-11 of part 1 but with light yellow this time
R12-16: 66sc
- 1slst in the 1st stitch
- Cut the yarn
Part 3:
R1-11: the same as R1-11 of part 2 and also with light yellow
- There is no row 12-16 this time
- Make 1slst in the 1st stitch
- Cut the yarn but leave a tail for sewing
- Place this piece on cardboard, trace around it 1x and cut out
- Glue the cardboard in part 1 (**2)
- Sew the last row of part 3 to the last row of part 2 and stuff while sewing (**3)
- Glue this piece in part 1 (**4)


Whipped cream:
R1: with white: ch87
R2: in every 2nd ch make a 5dc popcorn stitch, in every 3rd ch make a slst
- Cut the yarn
- Glue in place (**5)

Leaves (2x):
R1: with green: ch6
- Crochet around the chain now. See tutorial about this: https://youtu.be/s5NcBYBqZ0M?si=_SonaWpRExDxovK8
R2: start in the 2nd ch from the hook: 1sc, 1hdc, 1dc, 1sc, 3sc in the last ch, then on the other side 1sc, 1dc, 1hdc, 1sc
- Make 1slst in the 1st stitch
- Cut the yarn
- Make a 2nd leaf the same way
- Put them aside for later

Small flower:
R1: with white: 6sc in a MR
R2: in each stitch make *4dc + 1slst + ch1*
- Make 1slst in the 1st stitch
- Cut the yarn
- Put aside for later
Lime slice:
R1: with light green: 6sc in a MR
R2: inc 6x (12)
R3: [1sc, inc] repeat (18)
R4: [1sc, inc, 1sc] repeat (24)
R5: [3sc, inc] repeat (30)
R6: with green: [2sc, inc, 2sc] repeat (36)
- Fold the piece double
- In the next row you need to crochet the 2 sides together = you crochet through the front stitches together with the back stitches to close the folded slice (**6)
R7: [5sc, inc] repeat (21)
- Cut the yarn but leave a long tail
- Sew lines like this picture: (**6)
- Sew the slice in place (**7)
- Sew/glue the leaves and flower in place (**8 – **10)


You’re done! It was fun to make this, wasn’t it? Easy and quick mini lime pie. As I said earlier, you can make lots of different kinds of mini pies with this crochet pattern. So have fun crocheting more of these!
Let me know what you think of this pattern in this comments section below.
You can also post a picture of your mini pie in my Facebook group: Amigurumi Heaven (Craftygenesindonesia)


