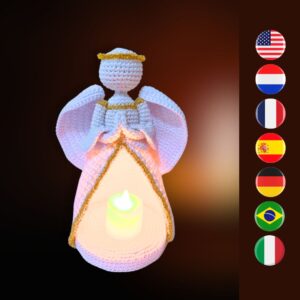
Categories
Featured Posts

Christmas ornament 3

crochet christmas ornament

Click here if you would like to purchase the pattern in PDF format, WITHOUT ads and sent to you by email.

This ornament is about 11cm/4.3inch high.

Supplies:

Yarn: light weight (3) yarn suitable for amigurumi and a size 2mm crochet hook in:

  • Blue
  • Metallic Silver

Crochet hook: size 2mm

Stuffing – scissors – stitch markers – tapestry needle – cardboard

The color of yarn you are to use for your row is mentioned at the end of the row. When nothing is mentioned, use the same color as the previous row.

Work only in back or front loops when this is mentioned. When nothing is mentioned, work in both loops.

I used an invisible decrease and invisible increase stitch instead of normal decrease and increase stitches.

Abbreviations:

Important information:

*2sc, inc, 2sc* repeat till the end = 2sc, inc, 2sc, 2sc, inc, 2sc, 2sc, inc, 2sc, …

*3sc, inc* repeat till the end = 3sc, inc, 3sc, inc, 3sc, inc, 3sc, inc, …

**This crochet pattern is a FREE PATTERN but it is copyrighted = you CANNOT sell it, claim the design as your own, publish it, distribute it, print and distribute it, print and share it, post it online, publish it online, post it on Facebook, translate it, copy it, … in any way or form without my permission!!!

You are allowed to sell the finished product (the ornament) BUT NOT THE PATTERN ITSELF!!!

If someone you know/on Facebook/… is asking for the pattern, DO NOT PRINT AND SHARE IT WITH THEM and DO NOT COPY AND PASTE AND SEND IT DIGITALLY OR ON SOCIAL MEDIA/CHAT APPS TO THEM. Instead give him/her/them the link to the pattern and send them to this page on my website.
LoveCrafts

Pattern

Row 1: 6 single crochet in a magic ring (6)

Row 2: 1 single crochet in every stitch (6)

Row 3: *1 single crochet, 2 single crochet in the next* repeat till end (9)

Row 4: *2 single crochet, 2 single crochet in the next* repeat till end (12)

Row 5: *3 single crochet, 2 single crochet in the next* repeat till end (15)

Row 6: *4 single crochet, 2 single crochet in the next* repeat till end (18)

Row 7: *5 single crochet, 2 single crochet in the next* repeat till end (21)

Row 8: *6 single crochet, 2 single crochet in the next* repeat till end (24)

Row 9: *7 single crochet, 2 single crochet in the next* repeat till end (27)

Row 10: *8 single crochet, 2 single crochet in the next* repeat till end ( 30)

Row 11: *9 single crochet, 2 single crochet in the next* repeat till end (33)

Row 12: *10 single crochet, 2 single crochet in the next* repeat till end (36)

Row 13: *11 single crochet, 2 single crochet in the next* repeat till end (39)

Row 14: *12 single crochet, 2 single crochet in the next* repeat till end (42)

Row 15: *6 single crochet, 2 single crochet in the next* repeat till end (48)

  • Turn it upside down and trace around these 48 stitches on a piece of cardboard.  Cut 2 of these circles

Row 16: 1 single crochet in the back loop of every stitch (48)

Row 17-22: 1 single crochet in every stitch (48)

Row 23: *6 single crochet, single crochet 2 together* in the back loops only.  Repeat till end (42)

  • Stuff the bottom tip lightly
  • Place 1 cardboard circle on the stuffing
  • Place the second cardboard circle on top of this

Row 24: *12 single crochet, single crochet 2 together* repeat till end (39)

Row 25: *11 single crochet, single crochet 2 together* repeat till end (36)

Row 26:  *10 single crochet, single crochet 2 together* repeat till end (33)

Row 27: *9 single crochet, single crochet 2 together* repeat till end (30)

Row 28: *8 single crochet, single crochet 2 together* repeat till end (27)

Row 29: *7 single crochet, single crochet 2 together* repeat till end (24)

Row 30: *6 single crochet, single crochet 2 together* repeat till end (21)

Row 31: *5 single crochet, single crochet 2 together* repeat till end (18)

Row 32: *4 single crochet, single crochet 2 together* repeat till end (15)

Row 33: *3 single crochet, single crochet 2 together* repeat till end (12)

  • Stuff lightly.

Row 34: *2 single crochet, single crochet 2 together* repeat till end (9)

Row 35: *1 single crochet, single crochet 2 together* repeat till end (6)

  • Yarn off and work away the end of your yarn in the stiches.

With the glitter yarn: slip stitch on the front loops of rows 16 and 23.  Yarn off and work away the end of your yarn in the stitches.

With glitter yarn:

Row 1: 6 single crochet in a magic ring (6) (make sure you leave a nice long end of yarn)

Row 2: *1 single crochet, 2 single crochet in the next* repeat till end (9)

Row 3: 1 single crochet in the back loop of every stitch (9)

  • Yarn off.  Use the yarn end from your magic ring to create a loop on top of this glitter piece to hang your ornament.
  • Use the other yarn end to attach this glitter piece to the ornament.  Work away your yarn in your stitches.
  • Make a small tassel with your glitter yarn by cutting 4-8 threads of the same length, fold them double and fasten a piece of thread around the top.  Attach to the bottom of your ornament.
Do you have questions?

If you do, click here to send me a message. You can also contact me in Whatsapp by clicking on the green Whatsapp icon on the bottom righthand side of your screen.

Feel free to post a picture of the finished ornament made with this pattern on social media. You may of course tag me in your post if you wish to do so.

You can also post a picture of the finished ornament in my Facebook group: Amigurumi Heaven.

Sofie Julien Versluys

Was born in Belgium but moved to Indonesia as a child. Have been living here ever since. I absolutely LOVE crochet and knitting. I made this blog to help others get to the same level as me. And to make sure people have a place to come to with questions. Even the very beginner questions. Go ahead and ask me!

All Posts

Leave a Reply

Your email address will not be published. Required fields are marked *

The maximum upload file size: 250 MB. You can upload: image. Links to YouTube, Facebook, Twitter and other services inserted in the comment text will be automatically embedded. Drop files here

You cannot copy content of this page - Je kan deze tekst niet copieeren

Newsletter

Subscribe to my newsletter to get updates on new patterns, discount, new blog posts, .. and to get a chance at winning a free pattern from my shop once a month
Choose newsletter language:

Contact + Bank transfer

Do you need to contact me?  Would you like to order a pattern by bank transfer?  Then click on the button of choice below.

Open chat
Chat me for help
Hello,

ENG: This is Sofie from Craftygenesindonesia. How can i help you?

NED: Dit is Sofie van Craftygenesindonesia. Hoe kan ik je helpen?